Monday, September 29, 2014


Social Media at Momiji: Week 3

Social media is any website, forum or application that lets you store and share content (text, photos or videos), communicate with others, and/or have followers and follow others.  Beyond Facebook and Twitter there’s a social media for every interest, including, news, career/ business, music, art, photography, creative writing, technology and more.  Over the next two sessions I’ll spotlight some of the most popular. For those of you with children in your life, I’ll highlight what they’re up to on the net these days.

Most of the websites discussed in this workshop can be browsed without joining.  Join only if you want to share your content or express your thoughts.  Take your time, do some research (lurk) particularly for any site you decide to pay to join. Consider your internet footprint. While putting yourself out there may be well worth the risk, personally and/or professionally, get to know your comfort zone. 

 
Removing your internet footprint:

Before you become active or more active on social media, it’s worthwhile to be informed about your internet footprint and best practices (the legal stuff).  For instance, the first version of this blog was wiped out and renamed due to a rash, misinformed personal attack on my professional reputation and the reputation of supervisory staff at workplace where I’m employed part-time. I followed best practices and yet an individual was able to cause trouble for me in the ‘real world’.  The internet isn’t terribly fair. So, Google yourself, if you haven’t already.  Yahoo yourself too.  Try Facebook’s new privacy tool as well.  You can delete posts and content or close any account, but your stuff will remain searchable for at least 3 weeks and possibly forever.  This wiki-how article does a great job of describing the steps required to attempt to eliminate your internet presence (my apologies for the confusing ads contained in therein): http://www.wikihow.com/Delete-Yourself-from-the-Internet 
 

Google

It has become much more than just a search engine. This blog, for instance came along with my Google email account (gmail). Google+ is a social network you can personalize.  Google ‘Drive’ offers a range of free online programming for office, home and student use.  This includes Google Docs, a free document creation and sharing program, as well as a shareable spreadsheet software (similar to Window’s Excel) and much more.  Picassa is Google’s photo retouching, sharing and storage service. Most of google’s office-type services can be published to the web as a distinct page accessed by a url (which you can post in a blog, comment or status update).  Yahoo, another search engine offers email, and ‘groups’, which anyone with a yahoo.com or yahoo.ca account can open and administer for free.  
 

Blogs

Blogging is for those who love to write and want to share information and/or ideas about their personal or business-related interests. Most blog accounts give you the ability to personalize your page display, create posts with links, photos and videos, receive comments from readers and have followers.  Google’s “Blogger” service is just one of many free and for fee blogs available.  Technically Facebook, Twitter and Tumblr are blogs, because they function as platforms for putting your voice and interests out there in the internet ether, and for receiving feedback from followers.  Some blogging ‘hosts’ or platforms are more searchable than others, depending on the host’s blog access and/or your settings (open to all or limited) and popularity, or number of followers.  Some offer fancier options. Wordpress is the most popular and commonly used in business, often as a newsletter and to encourage feedback. Many workplaces expect employees to have at least a basic understanding of Wordpress.

News

Reddit:  This news-oriented website has on occasion made news by applying the critical minds of its users to top stories.  It is sometimes used for live Q & A sessions (ex., author Robert J. Sawyer, politician, David Soknacki). The session is advertised in advance in other social media, such as Facebook and Twitter, so that those interested can read along or join in (if they have a Reddit account). Member posts are rated on the number of responses they receive.  Reddit membership options/ privileges increase with the number of posts you write and scale of discussion they generate. Also relatively new is an option to give ‘gold’ to a poster. Gold is bitcoin, which I believe you can purchase through Reddit. I’m assuming this feature is used to support charitable or political causes.

Of course you can comment directly on articles posted on news websites, such as CTV, CBC, Fox and so on. You can also sign up for news feeds for your internet browser, which will appear on your browser home page. Twitter allows you to follow news media and/or reporters/columnists. Radio used to be the fastest news provider. Twitter now puts you with the reporter and their smartphone at the scene. For in-depth stories, magazines are available on news feeds, twitter, etc. You don’t necessarily need a subscription.  Depending on the media outlet, some are free without limitations (Huffington Post), some allow a set number of free articles per month at no charge, and others restrict select articles.   


Wikipedia

As I mentioned, you or anyone across the globe (except China) can join Wikipedia and discuss, correct or even write articles, or provide photos. For this reason I include it among social media. About.com and How-it-works, as far as I know (things are always changing on the net!) hire and pay qualified contributors. Wikipedia has expanded to include dictionary and how-to websites. All you need is an email address to sign on. You will be confined to the ‘Sandbox’, that is you’ll be monitored and have limited privileges, until you learn how to format and compose on the site.

Another organically created website is the Urban Dictionary. Warning, it’s x-rated, by and for youth. Young people submit definitions to common and youth-culture words and phrases and the most liked definition rises to the top. I’m letting you know about this site, because besides being an example of crowd sourcing like wiki, it’s an up to the minute window into the often closed to adults world of today’s youth.


Photo Sharing

Tumblr, Imgur, Flickr:  Tumblr is very popular among tweens, teens and the under 25 set.  In addition to functioning like a blog, it’s a place to share and store photos and GIFs (photos often found via Google image search, animated together in short loops so that the subject repeats a usually humorous action over and over).  People on Tumblr (and elsewhere) also use graphics software, including Photoshop, to alter photos for artistic or humorous effect. This is called photomanipulation.  People share a variety of images on photo sharing sites as well as other social media like Pinterest, Facebook, and Twitter.  Dedicated photo sharing sites such as Flickr, have photo contests and other features attractive to shutterbugs.

Backing up your photo albums on the cloud is wise due to the real possibility loss due to weather, flood or fire.  (Backup as well on your hard drive and external storage such as thumb drives.)  Photo sharing and cloud storage also comes packaged with major operating systems, including Windows and camera software (HP and others) and via Adobe (known for its internet, office and graphics software).  Choosing the photo service that’s right for you may involve trying out a few. 
 

Pinterest

Pinterest is a unique website. Each person has a ‘board’ or set of pages devoted to ideas, recipes, photos, home décor, art, objects that they find interesting or beautiful. This is a forum on taste, rather than personal/ family/ work life.  You do not have to have the creative rights to items you pin on your board. For example you might display a Martha Stewart cookie recipe.  Anyone can find Pinterest images and links via google or other search engines. Only members can ‘pin’ other members’ posts to their own board. The number of pins or favourites a post receives will bring it to the top in searches. I don’t belong to Pinterest, but find it helpful resource for art and craft ideas for teaching. 
 

Next week, more special interest social media and discussion on the impact of social media on society, including copyright. I’ll also touch on the basics creating a website for yourself or your interest group.

Thursday, September 25, 2014

Acrylic Painting at Momiji Arts resources in Scarborough

ScarboroughArts website: save it among your 'favourites' on your internet browser or become a member for a nominal fee and receive the monthy e-newsletter. ScarboroughArts (formerly the Scarborought Arts Council) publishes the annual Big Art Book. It is a great resource whether you want to see local art exhibitions or be in them. It also offers a variety of courses and programs you may wish to participate in.: http://scarborougharts.com/

ScarboroughArts with Cultural Hotspot are putting accepting submissions for an exhibition in October at Cedar Ridge. Here are the details: http://scarborougharts.com/annual-juried-exhibition-call-for-submissions/

Scarborough Arts Guild is an area artist's collective which promotes the sharing of visual arts technical knowledge. Members and guest artists put on seminars throughout the year on a wide variety of artistic techniques in a range of media. The Guild also hosts two major juried exhibitions for members.  To join, you must be invited in by a current member. The waiting list to join the Art Guild used to be 6 or 7 years, but it's much much shorter now. I know many (wonderful) Art Guild members but have not yet joined. I have, however, been asked to teach a seminar on digital painting... but it will be months or possibly years before date/time are finalized.  Still this is an old and respected local art group worth looking into: http://theartguildofscarborough.com/members.html

Cedar Ridge Gallery Members: for a nominal fee of $10 you may take part in a winter and spring arts festival, and submit your work for the two annual shows in the gallery. The city of Toronto culture also runs art courses and studios in the old mansion.

Cultural Hotspot, a city of Toronto initiative to highlight local arts, which is winding down in Scarborough next month, is putting on a Yarn Bombing event on the grounds of Cedar Ridge Oct 4th and 5th: http://www1.toronto.ca/City%20Of%20Toronto/Economic%20Development%20&%20Culture/Cultural%20Services/Art%20Services/ART/Cultural%20Centres%20&%20Art%20Galleries/Cedar%20Ridge%20Creative%20Centre/Files/pdf/Cedar%20Ridge%20Yarn%20Bombing%20flyer%20medres150.jpg

Another art resource in Scarborough is the Framing Dames. They frame, sell art supplies, run programs for children and adults and hold exhibitions: http://www.framingdames.ca/

Nuit Blanche is almost here. If you're a nighthawk and love art be sure to get out to see the arts take over our city for one brilliant night:  http://www.scotiabanknuitblanche.ca/2014-event/

Momiji acrylic painters, you are awesome! I have so much to share with you and you have so much to show me.  Watch this blog for notes on acrylic paint, painting surfaces and a brief history of western (realistic and abstract) landscapes before our next class. 

Monday, September 22, 2014


Acrylic Painting at Momiji: Brushes, Brushstokes and Brush Care


BRUSHES

I found a comprehensive list of brush types on a decorative arts website: http://www.your-decorative-painting-resource.com/types-of-paint-brushes.html, which I’ve appended below.  There are many types of multi-purpose and specialty brushes.  A variety of sizes of Round (with and without points (for detail)), Filberts, Flats/Brights will probably be all you’ll need. Brush sizes vary across brands.

As I mentioned in class, natural Hog hair (stiff, thick, off-white bristles), which can carry more weight in un-thinned paint and create ridged strokes; and Sable (soft, brown hairs), which create smooth strokes and can carry more water/thinned paint—are expensive.  Synthetic hair brushes (bright white, fine bristles) fall between the two, in terms of holding water and paint and depth of stroke ridges. Also Imitation Hog Hair and Sable alternatives (often called ‘camel’ hair, although made of squirrel hair, among other natural hairs) are less expensive and create similar effects to more expensive genuine quite suitable for professional artists.  (Some of the ladies in class may be aware that makeup brushes are commonly made of squirrel hair.)  All—natural, synthetic, imitation bristle and alternative-hair—brushes are suitable for professional acrylic painting.

Unless they’ve fallen to pieces, don’t throw away your old brushes. Old, abused brushes are great for creating randomized speckles and scratchy strokes used in abstract painting, portraiture (hairs, freckles…) and landscapes (grasses, water foam and spray).

Don’t forget palette knives are great for mixing paint, but also for applying it, as are any number of household or makeshift tools (everything from natural sponge to bath puffs, crumpled paper towel, rags, feathers, twigs, old cutlery, rulers and fingers.) Palette knives come in plastic now as well as traditional metal blades. However, metal knives are more flexible and offer more control when creating impasto.  Paint can also be squirted directly out of the tube onto the canvas, thinned and poured, or spattered and dripped.

As in the game of golf, choose the tool according to the scale of the task. The longer the bristles or hairs, the longer the stroke. The longer the handle, the larger the canvas. Large canvases, also call for larger, wider bristles or palette knives. Lots of detail or small canvases, require smaller brushes. Remember though, painting isn’t about using the best/most expensive tools, but rather how your tools help you to get across your message and express yourself in paint.

Test brushes for quality, as demonstrated in class, by tugging and rubbing bristles to check for loose hairs and for their ability to retain their shape. Tug the base of the metal ferule to ensure that it’s securely attached to the handle.  

My next blog will cover acrylic paint and painting surfaces.

Here is the “Your Decorative Painting Resource” article:


TYPES OF PAINT BRUSHES


All types of paint brushes are featured here as well as a brief description of their main purpose.
Thanks to Heinz Jordan & Company™ as well as Loew Cornell™ for supplying images of their fine line of art paint brushes.
We've also created a section for proper care and maintenance of your brushes. We hope you'll find the information useful.


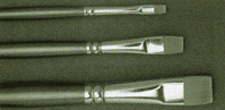
FLATS, SHADERS & WASH / GLAZE
Flats are the types of paint brushes you’ll use the most often in your painting projects. You’ll use them for basecoating, floating, strokework, blending, washes and varnishing.
As you can see, they’re very versatile.


FILBERT, CAT’S TONGUE & OVAL WASH
A filbert is a flat brush but it has a chiseled rounded edge instead of a straight one. Sort of like a cat’s tongue. When you look at the brush from the chiseled edge, the hairs should form an even oval edge.
As a tool for basecoating, these types of paint brushes can't be beat! The shape of the hairs eliminates ridges. It can be used for side-loading similarly to a flat brush to create shades and highlights.
It's also used for blending. And because it can hold a fair amount of water, it’s also great for applying washes of color. And lastly, because of its shape it’s perfectly suited for doing leaves, flower petals and bird feathers.


CHISEL BLENDER and BRIGHT
Also a part of the Flat family of brushes, the hairs here are much shorter. These types of paint brushes won’t hold enough paint for doing flowing strokes. They are very good though for blending paint, cleaning up messy edges and for other special techniques.


ANGULAR, ANGULAR SHADER, ANGLE FLAT and ROSE PETAL
A brush by any other name..... This one is also a Flat but it has an angular chisel or brush tip. This means it will hold less paint and water, so you can’t get good continuous flow.
On the very positive side, this is THE brush for doing tight shading and highlighting. And it is especially coveted by artists who love to paint roses and flowers because they can get into all those little nooks and crannies. So, if you’re painting a realistic rose, consider trying this brush. But for long floats or strokework... not the right choice... best to use a flat.


ROUND, ROUND STROKE and ULTRA ROUND
These types of paint brushes come in many sizes; The smallest being a 20/0 and climbing all the way up to size #10. Mostly they are used for strokework and watercolor. This one is invaluable as a teaching tool for perfecting brush control.
Learning to use this brush for traditional strokework will provide a very strong foundation for all your painting efforts. Strokework is beautiful so mastering it is worth the time and practice.


LINER, SCRIPT LINER, LONG LINER, MID-LENGTH LINER,SHORT LINER and SCROLLER
These are part of the Round family of brushes. They range in size from 18/0 to #8. Another feature of liners is that they come in different lengths and thickness. This means that selecting the right liner can be challenging. The longer the hairs, the more paint and water the brush can carry.
The best advice is to try a variety of these types of paint brushes and stick to the ones that feel right for you and the task at hand.
A script liner has longer hairs than a regular liner, which makes it appropriate for doing fine lettering. By the way, using a script liner means you have to have a lot of brush control. It can be a little difficult to manage in tight curves because it tends to flick out. Practice, practice, practice!
Obviously a short liner will do great for small details like eyelashes. And a scroller will be ideally shaped for doing, you guessed it, scroll work.

The best memory is nothing
compared to a good brush.
- Old Chinese Proverb


As you can see there are so many types of paint brushes. For the beginner you only need a few of the most commonly used brushes to start.
But as you develop your craft, you’ll want to start dabbling in all sorts of different ways to paint. That’s when you’re ready to try all types of paint brushes.


RAKE, FILBERT RAKE
The filbert rake is fun for creating hair, beards, feathers, fur, grass and woodgrain. It's a flat texturing brush with an oval, naturally fingered shape. Because of it's shape it offers softer edges than a flat rake.
When you're using either of the rakes you can choose to thin your paint depending on the effect you're trying to achieve. To get light texture just apply very little pressure. Don't overload the hairs with paint... the idea is to make sure that the bristles stay apart. Rakes are available in many sizes.


MOP BRUSH
A mop brush is designed for gentle blending and softening. Used with a light touch, these types of paint brushes can quickly blur and soften a hard edge.
Mops come in a variety of shapes. Some resemble a make-up (blush) brush. Others are flatter and stiffer. These are the ones we prefer to use.
Mops are available in 1/4", 3/8", 1/2", 3/4", and 1".


STIPPLER
Stipplers are the types of paint brushes used for creating fur and foliage and to give an open or soft general appearance to a painting. The stippler can be oval with flat, tidy bristles. Or it can be domed and round, as in this brush from Heinz Jordan.
It should be used dry. The amount of pressure you apply during the pouncing or stippling will determine the overall look and color value of your painting. They come in many sizes.


DEERFOOT STIPPLER
The deerfoot stippler is also a texturing brush used for creating fur and foliage. It's round and the bristles are long on the toe and short on the heel, bringing to mind the shape of Bambi's foot.
You should pick a deerfoot that has a lot of texture in its bristles over one that's stiff and neatly formed. You can use these brushes either wet or dry.
The amount of pressure you apply during the pouncing or stippling will determine the overall look and color value of your painting. They're available in 1/8", 1/4", 3/8", and 1/2".
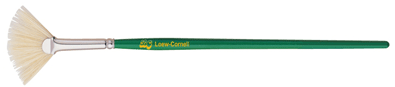

FAN BRUSH
The fan brush is flat with its bristles widely fanned out. It can be used dry to drag paint lightly across the surface of your painting. It can be used wet to create textures. And dragged through wet glazes it gives a fine wood-grain effect. Comes in a range of sizes.


DAGGER STRIPER
These brushes require a little practice to use at first... it's like they're a filbert brush with half their bristles missing! They are terrific once you get the hang of them.
Truly a multi-purpose gem. You can load the brush with multiple colors, create great ribbons and petals and do stripes all in one fell swoop!

NEEDLE POINTED BRUSH
This artist paint brush is fairly new and funky looking! The needle pointed brush is a round with a long liner that extends through the end.
You can create some very interesting effects, especially great vines and twigs. Loaded with inky consistency paint, the round part acts as a reservoire and the liner is, well...a liner. By holding it almost perpendicular to the surface and using varying amounts of pressure, you'll have loads of fun with this one! It comes in Sizes #4, #6 and #8.

FANDANGO BRUSH
The Fandango brush...we just LOVE saying it... looks a bit like a fanned mop brush. This brush has long hairs with shorter ones in between. All hairs have very fine points on the ends. Not only does this brush hold lots of paint, but stroke it once on the surface and you've just made lots of fine lines. Great for creating grasses, fur, feathers and Santa's beards. Ready to Fandango?!

WHALE'S TAIL
The Whale's Tail...a flat brush with the bristles cut in a "V" shape which can be used for lots of one stroke effects. Loaded with two colors and fully pressed, results in a tulip shape. Change to green and three presses of the brush will give you an ivy leaf. It can also be used to create plaid, ribbon, layered petals and palm trees. Available in sizes, 1/4, 1/2, 3/4 and 1".

WAVE BRUSH
The Wave Brush, with scalloped bristle tips, comes in multiple sizes cut in Angular, Filbert and Flat shapes. There's a ton of stuff you can do with these brushes. Quick and easy strokes result in flower petals, leaves, simple birds, butterflies, woodgraining, eyelet lace and more. They can also be used to stipple light, airy foliage, and for some dry brushing techniques. Set your imagination in motion and have fun!!!

FOUNTAIN BRUSH
Another interesting brush shape, the Fountain Brush has a ring of bristles with a center opening. Loaded and spun in a circle gives you a quick rosette. Press down firmly for other interesting petal shapes. Also, try your hand at stippled foliage or fur and pulled strokes that create waterfalls and feathering.


***
BRUSHSTROKES

Since cave painters used fingers and sticks to visually tell stories about the hunt, countless ways of applying paint to surfaces for any number of effects have come along. Most commonly taught nowadays are the brush techniques, rooted in classicism, handed down by highly skilled painters of the Renaissance.  But it’s worth noting subsequent modern styles that eschewed classical techniques in favour of expression and experimentation, such as the drip and splatter work of Jackson Pollack.  Technique is the ‘craft’ aspect of fine art. The ‘art’ part travels from the mind and heart of the artist through the hand to the brush and medium and onto the canvas.    

Each one of you come to painting with your own personality, taste, experiences and artistic strengths, which are discovered and expressed through creating art.  My way of painting and teaching painting is just one of many.  I do not want to train a room full of students to clone my style (even if I could). My goal is to help you discover or hone your existing style.  To encourage you to become better at being the painter you are. 


General Information About Paint Application

Brushstrokes are just one of many ways to apply acrylic paint to a surface. With acrylics anything goes, from finger-painting, to dripping, spattering, splashing, using palette knives and other implements, staining or rubbing paint in, sponging, and more.

Oil paint never truly dries. While post-renaissance painters discovered modern ways to apply oils, namely, ‘wet on wet’ (as opposed to the traditional method of building up an oil painting from a stable first layer), a flat, stable, sturdy, preferably smooth surface is still a must. Acrylics on the other hand can be used to paint on a wide variety of surfaces beyond canvas, paper and wood. I’ll talk more about painting surfaces in another blog, but it’s important to say here that the surface is relevant to the type of brushstroke one might attempt. Highly smooth to lightly textured surfaces, create less drag on the brush and more ease in creating flowing strokes with unthinned paint. But when using thinned paint on a highly glossy surface, such as plexi-glass, you may find that, even when using a fine sable or synthetic brush, the paint separates so that long strokes break down into droplets in places. Rough surfaces like stone require stiff hog hair brushes (natural or imitation), heavily loaded with paint sometimes lightly thinned with water. 

Brushstrokes for oils, watercolours and acrylics are very similar. Watercolours are almost always used thinned and applying them is about controlling the concentration of pigment in water. Oils and acrylics are used with and without thinning, but acrylics can break down if thinned to a ratio of greater than about 50%. For acrylics thinning with water is most often used for washes, glazes, scumbling and sustained flowing strokes.

Undiluted acrylics can create oil-paint-like textures and effects by loading the brush with more or less paint and applying more or less pressure on the brush. 

Some brands of paint, including Liquitex are designed to imitate the flow of oil paint, while Stevensons’ acrylics have a ‘toothpaste-like’ texture that is natural to acrylics. For better flow give them a stir on your palette with a brush or palette knife, or use a damp brush.  Certain hues of paint can also tend to be more pasty than others, or conversely runny or prone to separating.  Again, a quick stir before loading your brush will address this.

Also some hues are tend to be translucent while others are opaque (this varies across brands). This is important when mixing colours, but also with brushstrokes. Translucent hues tend to flow better, but provide less opacity or coverage. Layering, or adding an opaque hue from the same family (warm or cool) are two options. For a while now, some typically translucent hues have been manufactured to be more opaque and are often labelled as ‘permanent’. I will go into more detail about acrylic paint and acrylic mediums in the next blog.  

While quick drying time and water solubility of acrylics has many benefits, one drawback is the difficulty of replicating oil-painting techniques such as ‘wet on wet’ and large areas of gentle gradation in colour or value (light to shade).  Retardant medium can be used, or water-based oils are a good alternative for this style of painting.  However you can create wet on wet or gradations with acrylics if you have two things: an uninterrupted span of painting time, and a spray bottle filled with water and set to ‘mist’.  I’ll demonstrate this in a future class.

Common Brushstrokes

Stippling, pointillism or dabbing: Pointillism was most famously used by post-impressionist painters Paul Signac and Georges Seurat to build colour combinations that to the eye would convey more than the sum of their ‘hues’. These techniques, which involve quick up and down movements of a (usually) round brush, are also great for impressionistic foliage, dappled light, mottled textures and more. Try it with different brushes and one or more hues of paint on the brush. Get a feel for the subject you’re trying to depict and identify qualities like density, direction of elements (such as leaves, grass, hair), and light and shadow. Any small strokes, especially if repeated, quicken the pace or give energy to that area of the composition.

Blended brushstrokes: Artist Mary Pratt, in order to increase the photo-realism of her paintings blended out most of her stroke texture.  To achieve this effect, use a paintless/waterless sable or camel hair round, flat, angular brush or hog hair or synthetic fan brushes to stroke raised wet paint away with sweeping and buffing motions.

Chinese-like brushstroke: With a round, pointed brush, loaded with ‘dirty’ water and undiluted paint at the tip, make stokes by holding brush with handle erect, flatten the bristles and pull the brush along, lifting straight up or gradually at the end of the stroke. Creates a shaded effect. Works for long leaves, saplings, stems, and more. Twirl the brush ¾ instead to make a flower petal. A delicate technique that emphasizes brush handling.

Curved strokes: Any curved strokes used to create organic or rounded lines or shapes. Often used for clouds, smoke, eyelashes, tendrils or flower petals.

Dry Brush: A medium length stroke using a brush with only a blush of undiluted paint on the tip. Old brushes work well for this technique. Most successful on textured surfaces, or on top of a layer of dried brushstrokes. Useful for depicting floorboards, rustic painted objects, rocks, grasses.

Flowing strokes: Any long, sustained stroke, created with or without water added. Long strokes direct and slow down the eye. They’re often used simply for coverage of a large object or area, or to create a feeling of tranquility.

Glaze: A layer of thinned paint, usually applied with a large filbert, bright or mop brush.  Great way to create skies or flat areas of colour. Used in mixed media with oil-based media such as oil pastel to create ‘resists’.  Glazes can create rainy day or smeary effects. Mutliple layers of glazes can be used to subtly blend colours on top with those below.

Impasto: Can refer to any raised texture, or a technique involving undiluted paint applied thickly, often with a palette knife on a sturdy painting surface. Strokes can be long or short. Effective when done wet on wet (see below). Used for impressionistic and abstract styles. It adds texture and shows off the tactile quality of paint. 

Ridged stroke: A medium stroke of undiluted paint loaded on the tip of a hog hair (or imitation hog hair) brush, keeping handle at a roughly 45 degree angle to allow ridges to form. The grooves left behind by the bristles are tactile and show off rather than hide the brushstrokes. Good for creating textured under-layers as well for dry brush and glazing.

Scumbling: Glazing over an area of dark or intense colour with white or a tint (hue + white) for a softening effect.  Usually follows strokes below. Can also be used to give the impression of lack of definition, or ‘blurring’ as in the distance of a landscape or at the edges of a portrait or in lower layer of an abstract. 

Sgraffito: Incising or scratching through one or more layers to reveal a colour below. Can be accomplished with any tool, such as the tip of a palette knife or a pin. Commonly used for depicting grasses, but also in abstract work.

Splatters, drips, drizzling, etc.: Methods used by abstract expressionist painter, Jackson Pollock. Also found in contemporary abstract art and graffiti writing. Paint, sometimes diluted for flow, is flung, drizzled, squirted from the tube, poured from a bucket, splattered on, or applied with fingers—to give an uninhibited and energetic feel to the work.

Staining: A technique used by abstract expressionist painter Mark Rothko. This can be recreated with acrylics by rubbing a scant amount of paint into the (unprimed) canvas with a rag, mop or large filbert brush.

Wash: A method of filling in background or creating an underpainting where paint diluted to the maximum is spread with a large brush designed to hold water well, such as a large filbert, bright, round or a mop brush.

Wet on wet: Painting over wet areas, often stirring up and/or mixing colours below with a sturdy brush or palette knife. For acrylics use retardant medium or keep paint wet with a spray bottle.

Experienced artists would probably say that they don’t stop to think about the name of the brushstrokes or paint application methods they use. They just paint. Brushstrokes do more than merely depict, they convey mood, rhythm and direction. As you gain confidence your brush it will become an extension of your hand. And you’ll just paint too.

Brushstroke Faux pas

However you apply paint to a surface, relax your fingers, wrist, arm and shoulder. Focus your mind on the idea, subject matter or mood you’re reaching for. If you’re feeling disconnected from the work or frustrated—pause. Return to painting only when you can look at it with fresh eyes. Other tricks to get a fresh perspective are: holding it upside-down or holding it up to a mirror. Works like a charm for me.

There’s no right or wrong, just strokes that stray from what you intended. Any ‘mistake’ noticed right away no matter how ego-destroying can simply be wiped away with a wet rag. 

Some ‘mistakes,’ however, are ‘happy accidents’. They can happen when you’re engaged with the medium. Your mind is telling you to test out an unanticipated direction that has naturally arisen out of the process of creating.  Take a moment to reconsider wiping it away with a rag. If you go with it, you’ll often be glad you did.

The most common ‘mistake’ is trying to paint over or next to a semi-dry area of paint. This can cause the paint to go tacky. The area will look like a spackled plaster ceiling. Unless this is what you want, add water from a spray bottle and stroke it out wet brush. If the area is beyond immediate repair, allow to dry and sand with fine sandpaper. With areas of the composition that abut or overlap, or when attempting a quick fix, let the paint dry before painting beside or overtop.   

Another common mistake is being too frugal with the paint. Leaving areas of the canvas unpainted is a valid technique used in modern art. As in Asian influenced styles of painting, you are leaving the white of the canvas to be read by the viewer as any relevant background.  Or there’s unimportant or negative space, or contrast used in styles that have a block print effect.  Using acrylics to create watercolour effects is also valid. But otherwise not applying enough paint could make your work seem tentative, skimpy or worse, immature. 

Overpainting is simply not knowing when to stop. Textures become muddled and colours muddy. Overpainting is tough to fix (copious sheets of sandpaper and/or a fresh layer of gesso or latex primer), but easy to avoid the next time, by simply breaking away from the work periodically and being open to putting down your brush before you consider the piece ‘finished’.

Size Matters. First, large paintings are intended to be viewed from far away. Any detail you include, unless it enhances the long view or draws the viewer in for a closer look is generally wasted.  When painting big pieces you should walk away from the canvas frequently to see how it looks at the ideal viewing distance. Large canvas means large brushes and broad strokes involving the whole arm.  This is best accomplished standing or sitting at an easel. Small to medium canvas means small to medium brushes and confined strokes. Details are done with the hand and wrist, so being seated works well. But you may wish to stand or use a table easel to free your arm for somewhat longer brushstrokes. Splatter, drips and drizzling sometimes require thinned paint and are often done with the canvas on a floor or worktable due to gravity.


BRUSH CARE

Except for the brush you are using at the moment, keep painty brushes in water while working.  Change water frequently and before doing washes or glazes, unless you’re going for a ‘dirty water’ effect (Chinese-like painting technique I demonstrated in class.) Acrylic paint dries quickly and can clog up bristles and/or leave small, dried paint lumps on the canvas. If your painting sessions last more than a few hours, make sure the water line falls below the metal ferule to prevent water damage to the wooden handle.

Wash brushes by working hand soap or dish detergent and water from tip to base, and rinse thoroughly with running water. Pat dry with a clean rag or paper towel.  While damp, reshape the tip with your fingers.  Store brushes standing up with bristles upward. If you’re painting plein air, or where washing up facilities are unavailable, wrap your brushes in a sopping wet paper towel or rag and seal in a plastic bag. Wash properly as soon as possible. 

When travelling with brushes store them in a way that prevents the tips from being crushed.  Some brushes are sold in large plastic tubes wrapped in a holder made of canvas with pockets.  Recycled Pringles Potato Chip tube, paper towel tube or postal mailing tube—work well.  You can also stand brushes heads up in a rinsed/dried water container or in a pocket in your tote bag.   

Palette knives should be wiped thoroughly and immediately with a rag or paper towel with each use. Watch that you don’t contaminate one colour of paint with another while slicing paint from tube openings or dipping into paint in jars.

Cheap, plastic kitchen scrub pads (and water) are ideal for cleaning palette knives, brush handles, work surfaces, and many flooring and wall surfaces.

Always close paint containers and put caps on paint immediately after use.  If messy, first wipe tube openings and jar mouths/ lid insides to prevent dried paint from forming.  When caps and lids are stuck (this will happen despite your best efforts) run a palette knife around the seal, then try opening wearing a rubber glove. If this fails, run under warm water for a minute and try again. Jars often open more easily if turned upside-down and tapped on a hard surface.  No need to call on someone with a strong pair of hands.;)

Surgical gloves will keep your nails and hands paint free, but wipe regularly (same goes with your bare hands) on your apron/smock/rag to prevent unintentionally transferring paint to the painting surface.

Acrylic Paining at Momiji: Materials List updated Jan 14/2015


Acrylic Painting at Momiji
Materials List
Artist’s quality paint:

·         150 ml tube of titanium white
·         60ml tubes each of the 4 following colours:  iron oxide black or mars black, yellow ochre, burnt umber, raw sienna.
·         60ml tubes each of the following cool and warm primary colours* (6 in total):  alizarin crimson (cool red), cadmium red medium (warm red), lemon yellow (cool yellow), cadmium yellow light (warm yellow), ultramarine or cobalt blue (cool blue), and phthalo or cerulean blue (warm blue).

*Colour (pigment/ hue) names vary. 
Note:  If you have acrylics at home you may bring them. ‘Artist’s’ quality paints are suitable for exhibition (while lower grades of acrylics – such as ‘student’, ‘scholastic’ or ‘craft’ have more filler, less pigment, and aren’t suitable for exhibition.) 
Artist’s acrylic paint brands include:  Winsor & Newton, Stevenson’s, Golden, Liquitex, TriArt, Grumbacher, Rembrandt, Da Vinci, Reeves and many more. 
Art Supply Stores in Toronto:
·         De Serres has several locations in Toronto, the closest is on Danforth Ave., but tends to be pricey.
·         D.L. Stevenson & sons, or “Stevenson’s” is on Warden just south of Sheppard.  The paint is made on site.
·         Curry’s has three stores downtown, but generally higher prices. 
·         Michaels has stores in Kennedy Commons, Pickering and on Yonge St.
·         Loomis and Toles is still around (as far as I know) on the Danforth and Uptown.  
·         Woolfitt’s, Aboveground, Gwartzman’s, Tern and Toose are located near OCADU (Queen St. West area).  Gwartzman’s is known for reasonable prices.
·         Artist’s paints and supplies can be ordered online from some of the above retailers.
Painting Surfaces:
A minimum of 3 of any of following types of medium-sized (approximately 12” x 16”) painting surfaces:
·         Pre-stretched, primed canvases, pre-fab wooden (often birch) painting surfaces or canvas boards – available at WalMart, Dollarama and art supply stores, or
·         Masonite boards:  masonite wood product is sold in big sheets at Rona, Lowes, Home Depot.  You will need to cut the sheet to size and prime the smooth side with two or more coats of latex primer or Gesso (available in building stores and Art Supply stores respectively), or
·         Canvases that you have hand-stretched and primed (as above) at home are welcome.  
Brushes**:
A selection of 8 to 12 brushes made of real or imitation hoghair bristles, and sable (or cheaper alternative hair) in a variety of shapes, including ‘square’ or ‘flat’, ‘round’ and ‘filbert’, in various sizes ranging from small (approx., 2mm or 1/8”) up to large (approx., 2.5 to 3cm or 1 to 1.5”). 
**Brush sizes are not standardized across brands. 
Note:  Natural hoghair bristle and natural sable hair brushes sold individually are very expensive. Imitation bristle or cheaper alternative hair brushes (such as ‘camel’) sold in art supply stores are less expensive and quite suitable for beginner and experienced painters.  Packaged sets of brushes sold at art supply stores are fine, but you’ll probably need to buy a large-sized brush separately.  If you already have brushes at home, bring them to class.  Brushes you have used for oil painting are fine if thoroughly cleaned with solvent and washed with dish detergent and warm water.  Here’s a good link on artist brush buying:  http://painting.about.com/od/artsupplies/ig/Intro-to-Art-Paint-Brushes/
Other materials, tools, equipment, etc.
·         Canvas paper (sold in pads) (optional for practice work).
·         Teacher’s chalk (white) or charcoal sticks
·         HB pencil
·         Sketchpad, multi-purpose paper, your preferred size, or the one you are currently using.
·         Easel (optional, not supplied by Momiji), table-sized or stand-alone (floor).
·         Water container
·         Rag
·         Smock or apron, vinyl gloves (optional)
·         Palette knife, tapered or rounded or both
·         Palette, traditional re-usable with thumb hole, or recyclable (ex., foam dinner plate, piece of wood, large plastic lid.)
·         Newspaper, drop sheet.
·         Masking tape or painter’s tape (1”)
·         Ruler
·         Container for paints (Rubbermaid-type storage container, large Ziploc bag, shoebox, etc.) 

Print this list for reference. Contact me at margaretchown@rogers.com if you have any questions.
 

Acrylic Painting
Momiji, Fall 2014
Thursdays, 12:15pm to 2:15pm, Adult
Instructor, Margaret Chown

Course outline

Week 1 (Sept 18th)
Course overview, my approach is one of many. The freedom of working in Acrylic paint.
Paint and artist’s tools, equipment overview.
Undersketch and visual perspective demo. Watercolour-type brush techniques demo. Sans layering exercise, abstract or realistic still life on sketch paper.

Week 2 (Sept 25th)
Layering, acylic/oil-type brush strokes demo. Chalk undersketch. Small canvas still life or abstract using layering.

Week 3 (Oct 2nd)
Landscapes thru history (East and West). Basic and 1-pt linear perspective undersketch demo. Landscape/nature brushstrokes demo. Landscape on medium canvas based on photo from home or instructor.

Week 4 (Oct 9th)
Continue work on Landscape.

Week 5 (Oct 16th)
Portraiture a brief history. Symmetry of faces and how to capture likeness. Form and value. Sketches on paper based on photo from home or instructor. Earthtone underpainting on medium canvas.

Week 6 (Oct 23rd)
Continue work on Portrait.

Week 7 (Oct 30th)
Overview of acylic mediums and non-brush techniques. Mixed media: Your choice of subject matter and style on medium canvas adding substances, objects from home.

Week 8 (Nov 6th)
Complete all work. Judging your own work. Constructive criticism of other’s work. Class Critique.

Abstract and realism will be covered. Students are encouraged to work in their own style. Experienced students may work on independent projects.  Experimentation is welcome.

Sunday, September 21, 2014


Momiji Social Media Workshop

Twitter Tutorial, Week 2

Getting Started

As with most social media the only thing you need to set up an account is a valid email address and you must be 14 or older. 

Twitter is free, like most (not all) social media.

To sign up, go to google (or your favourite search engine) and enter “twitter” in the search bar.  On the Twitter home page, find the sign up window. 

Choose a username, but be aware that regardless of your online moniker, others tweeters can find you by simply searching your first and last name.  This may not appeal to you, but less anonymity leads to fewer ‘trolls’. 

Add an avatar.  You have the option of downloading a photo of yourself or of something that represents you or your interests from your hard drive (‘my pictures’ for windows users).  You may have to reduce the size of the image.  This can be done with Microsoft paint and most photo editing type software.  If you skip this process, Twitter will give you an egg as an avatar.

Fill in required fields, including finding 15 people or organizations to follow.  I found this part difficult as I have only a dozen or so family members and personal friends on Twitter,  and you can’t complete the sign up process without doing so.  However, you can always ‘unfollow’ choices that don’t work out later.  Twitter will make suggestions, some of which might interest you.  You also have the option of allowing Twitter to search your email contacts for people who have a Twitter account that you might like to follow.  Or, you can use the search bar to find specific people or organizations.     

Next, Twitter will send you a confirming email.  Go to your inbox and click on the link to activate your account.  Done!


Setting up your account

Before you start tweeting, click on the gear symbol on the toolbar at the top of the Twitter window.  Go through every setting, checking to make sure the defaults suit you.  You may wish to use the highest privacy/security settings at least initially.  For example, you can decide who can see your tweets and retweets.  A tweet is a comment, link, picture, or video that you post on your page or some else’s page or tweet.  A retweet is similar to a Facebook ‘share’.  You also can decide what you want to be notified about via your ‘notifications’ page (accessed by the ‘bell’ icon on your Twitter taskbar), the email associated with your account or your smartphone.  I recommend selecting for showing your who is re-tweeting your tweets, as that member may not be among your followers. Your location is something you may want to keep private.   

Twitter will prompt you to change the look of your home page and ‘me’ page.  This is optional.  You may change the colour scheme or add photos.  If you wish to personalize your account, follow the prompts.

Send your first tweet.  Write it yourself or use the pre-prepared tweet.


Tweeting, Following and #Hashtags

Your Second Tweet:  On the far right side of the taskbar along the top of the Twitter window, click on the button that has a quill pen.  A composing window will open up. 

As you type your message, a word count indicator shows you how many characters remain or, if negative, how many characters over the 140 character (including spaces) limit you are.  Your tweet may include a comment, a url, photo or video and/or a hashtag.

Check your spelling.

…Remember what you wrote could be transmitted across the world in seconds.  “You are what you tweet”. 

Photos:  To include a photo, click on the camera icon at the bottom left of the composing window.  A ‘browse’ window will appear.  In windows go to wherever you saved the image you’d like to share, which is usually ‘pictures’ or ‘downloads’.  Click on the image or type in the file name and select open to upload.   Mobile phone photos may also be shared via the Twitter app.  See link below. 

Urls:  To include a url with your tweet, simply copy it from the browser bar of the originating website and paste it into the composing window.  Urls are automatically (you can’t opt out of this feature) shortened by Twitter’s t.co link shortener.  This is for security reasons and because of the 140 character limit. T.co shortens every link to 20 characters (regardless if the original link is shorter).  At the same time t.co checks the link for common malware, ‘bad’ links, etc.  So, if you try to post a bad link, a warning box will pop up on your screen.  You may use a non-twitter link shortener such as bit., especially if you’re posting the link on various social media accounts, but on Twitter, the site’s own link shortener will still alter it to 20 characters. The bottom line is that t.co makes surfing Twitter very safe.

Twitter has other limits:  You may make up to 1000 tweets per day.  (This is to prevent spammers and bots.)  Your timeline, however, will only display the 100 most recent ones. This includes your retweets.

On the taskbar (far left):  Clicking the house icon takes you to your home page and updates your news feed, which includes the most recent tweets from friends and organizations you follow.  You will also see tweets in which you or those you follow are tagged. Twitter names have two parts. The first part is your name or a Twitter name you have selected. The second part begins with the @ symbol and may be the same or different than your ID name. The @ symbol name is the tag, which links directly to that person’s Twitter page.  Occasionally tweets in your feed will be promotional ads, and are marked as such. 

In your newsfeed.  Clicking on links in Twitter is relatively safe.  Be sure to look at the source of the link, making sure you follow the person or organization tweeting or retweeting it.  Some put “RT” at the top of a retweet, but this isn’t necessary, as retweets are marked with green arrows in the top left of the window. MT is a paraphrasing of someone else’s tweet (occasionally necessary due to character limit).

If you wish to comment on a tweet, right beneath the tweet click on ‘expand’.  A comment field and others’ comments (if any) will appear, as well as buttons to reply, retweet (share on your twitter page) and favourite.  Clicking on ‘more’, allows you to share or retweet in a comment on a blog or other social media.

To follow a member of Twitter, whether an individual or organization, type the name, say, Globe and Mail, in the search bar. From the drop down list, which auto-suggest as you type, choose the closest match. Click on it. You’ll be taken to the page. You can look around the page to make sure it’s the person or organization you had in mind. Then you simply click on the ‘follow’ button on that person’s or organization’s page. They may or may not follow you, but the next time you click ‘home’ to visit your newsfeed will include their latest tweets. If you see a comment that intrigues you in your newsfeed by someone you do not follow (often a retweet or a comment on the tweet of someone you follow) and you think you might want check them out, perhaps follow them, you can also find their page by clicking on their avatar or @name tag.  Just because someone follows you, you are not obligated to follow them. You can also unfollow anyone at any time.

There are bots on Twitter, even with limits on the number of tweets as well as follows. These bots mostly want to sell you something. Some lead to erotica pages. Bots do not participate in conversations, post comments or retweet your witty comments, etc.  Quotation bot pages seem to be popular and quite harmless.  Bots seek out people to follow. Anyone, human or bot, whom you don’t want as a follower can be blocked or ‘muted’. Muting is a kinder choice for a humans you follow who post mulitiple tweets about topics you have no interest in.

#Hashtags. When you type the # symbol with a keyword after it, at the end of your comment/ photo, such as #painting. Anyone who happens to type #painting into the search bar, would see my picture among others posted recently. With the election going on, many users are tagging their comments about the candidates with #TOpoli. This stands for Toronto politics. To find out the latest election developments, I can simply search #TOpoli.  This will take me directly to a page devoted to comments hashtagged #TOpoli.  If you want your followers to find your comment, say, on a restaurant you liked, if you type #Italianrestaurant, you’ll have better luck than if you typed #bestfettucinialfredoever.  This hashtag could bring up restaurants, but also recipes, or it could be the lone entry on a #page.  Choose the general rather than the specific.  As you type a hashtag in your search bar or comment box, Twitter will auto-suggest a list of popular hashtags.


Direct Messages

As with facebook you can send and receive private messages that are not shared on the newsfeed. To send a direct message or DM, go to the person’s page and you will see a ‘message’ next to the ‘tweet to’ button just below the individual’s avatar. When you receive a message or reply a number indicating the amount of notes you have will appear on the ‘envelop’ icon on the task bar. To open messages, click on the ‘envelop’.  Scroll down. Click on the new message to open it (which includes a reply box at the bottom.) DMs are one of several features which use the (windows) grey screen for security.


What’s ‘Trending’

Popular hashtags and searches of the moment are displayed on the left of your newsfeed. I don’t use this feature much, but it might be useful after a vacation from the internet to catch up quickly news you follow.


#Discover

This page uses an algorithm to supposedly find the tweets you’d most want to see. Your newsfeed is chronological, newest tweets appearing first. I’m guessing that ‘Discover’ chooses content based on popularity and followers or topics you’ve shown the most interest in (as Facebook does for their newsfeeds). Anyway it’s an option for those who prefer their news filtered. 


The Rules of Twitter:  

Always read the fine print.  Twitter aims to be a nice place:   


Also Terms of Service: 


And Guidelines and Best Practices:


Unlike news and other forums or groups online, Twitter (and Facebook) isn’t moderated and relies on you to report spam and abuses such as stalking, bullying or pornography. 

Note for those posting their copyrighted material (visual art, poetry, prose), unlike Facebook, your ownership is clear and respected.  However your art can be retweeted around to the point that your name could become distant or even separated from it. I’ve had a few notifications saying I was ‘mentioned’ in a Tweet, which included a jpg of my artwork. ‘Mentioned’ means that at least my tag, @MargaretChown was still attached to it.


The Twitterverse

Twitter had its 8th birthday in July 2014.  At election time or when big news stories occur, it’s not uncommon for TV and radio newscasters to quote comments from the ‘Twitterverse’ or gauge public opinion based on tweets, or quote tweets in print and broadcast newsmedia. 

What you do on any social media website is up to you.  But consider the consequences of, for example, publicizing someone’s contact information (address and phone number).  What if you have it wrong and what if harm comes to those at that address as a result of your post?  This actually happened.


The character limit can make your posts sound rather pithy.  Sometimes, like newspaper headlines, brevity can lead to confusing grammar.  Also you may be just joking, but that may not come across on the screen.  As with any post, count to ten before you send. 


Twitter across other social media

You can create a link to a tweet in a comment on another social media account.  To do so, go to the tweet you’d like to link, click on details, then copy the url that appears in your browser bar.  Paste the link in a post or message on facebook, your blog or elsewhere. 

You can embed a tweet (fully clickable) into your website of blog by going to the tweet, selecting ‘more’ and then ‘embed this tweet’. 

To add the Twitter button to your website or add a tweet to your website follow instructions from Twittter Help Centre:  https://support.twitter.com/groups/52-notifications/topics/211-tweeting/articles/231474-adding-the-tweet-button-to-your-website#

From Twitter Help Centre:  Getting Started with the Twitter Mobile app: